Saturday, October 15, 2016

Hybrid Application Development

I recently installed Ionic2 and MongoDB so I can begin to familiarize myself with the new world of hybrid application design. I chose Ionic because it is currently the leader in front end standardization for mobile (iOS and Android) as well as web applications. It uses Cordova to build the application for the desired mobile platform which makes development easy since I only have to code everything once then deploy to all environments. MongoDB is a SQL-less database technology that, instead of storing data in rows and tables, data is stored in a JSON format which allows for easy schema modification and scaling for growing applications. I chose this because, as I am building this app on the fly, I do not necessarily know exactly every data point that needs to be stored upfront. While working through some of the finer points, the below will outline some of the issues that I encountered that aware not necessarily intuitive so I feel they should be documented somewhere.

Ionic 2


In order to install Ionic, we need to install node.js. One thing to note here, we normally always install the latest version of software and it normally works but sometimes node can be fickle and be really buggy in latest versions. I suggest picking a version that is a few versions behind the latest to ensure the major bugs are worked out and patched; at the time of writing this blog, I am using v6.1.0.

There are two Command Line Interface (CLI) commands that I find very useful when developing with Ionic; they are "--dev" and "--save". --dev is currently deprecated in v6.1.0 and is replaced with "--only=dev" but the functionality remains the same. This command recursively fetches node packages which means it pulls all dependencies along with the parent package. This is incredibly useful for new developers who need to set up a new environment and might not have the granular package detail as existing environments. An example of this, on Windows, is as follows: "npm update --dev" or "npm update --only=dev".

The second command is "--save". This command pulls the plugin AND adds a reference to the plugin in your config.xml file which contains all plugins your project is using. Many times while developing we might want to test some plugin but not actually save it so we can omit the "--save" and ensure it is not coupled with the project. An example of this, on Windows, is as follows: "cordova plugin add cordova-plugin-facebook4 --save".

Command Prompt


When I first started developing in Ionic I used a non administrator command prompt which eventually led to much frustration because it would serve me errors that had little support on the internet. It took me a little time to discover that these errors were not caused by any code or setup problems but rather the fact that I installed/ran Ionic2 with this non administrator command prompt. Make sure when starting up a command prompt, that you open it with administrator privileges otherwise you will encounter errors and become frustrated with it not working.

Conclusion


I learned a ton about the beginning stages of building a hybrid app over this week and I hope to continue this learning by extending it to native plugin integration such as Facebook / Google+ / Twitter authentication and database integration. One theme that continues to pop up while working with all these technologies is the difficulty in learning new software. Every time there is something new, it is inevitable that we will encounter hardships that feel impossible, but if we can break the problem down and understand its parts, we will eventually solve the problem and grow our knowledge continually.

As always, feel free to leave a comment or question. Happy programming!

Saturday, October 1, 2016

Click Events and Components

Looking Back and the Road Ahead


It is the start of my third month from the start of this blog's and I am pleased with my progress so far. Looking back and remembering all the things I have done up until now is very satisfying. Here is to another three months and more!


Click Events


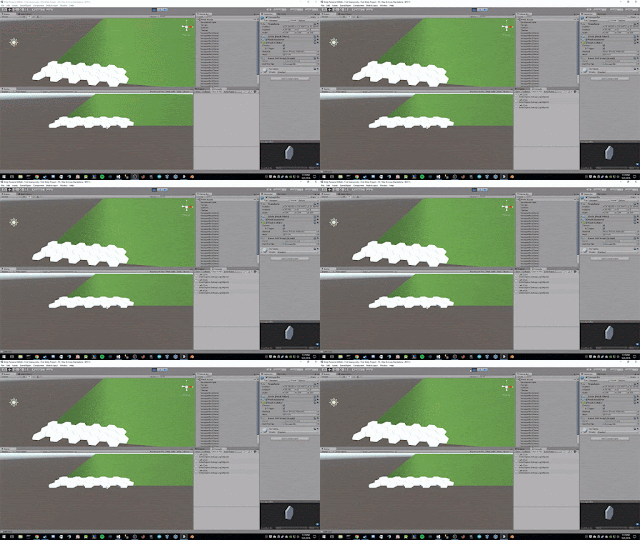
In any modern game, the user needs to be able to interact with objects they see on the screen whether it is with a mouse, controller, or touch. In Unity, MonoBehaviors extend specific events such as "OnMouseDown() and OnMouseOver()" and when a collider component is attached to the GameObject the events will trigger the predefined methods if specific requirements are met. It is important to note that if your GameObject DOES NOT have a "Mesh Collider" component the events will not be fired. Another caveat about the above two methods is OnMouseDown() is only useful for left mouse button clicks, however, the OnMouseOver() method is able to capture all three mouse button inputs. An example can be seen below of this behavior.

(On this example I click each mouse button four times but only the left click is caught.)


Distinguishing the differences between these two methods was painstaking since there is no documentation of this behavior and many stack overflow answers referenced older versions of Unity which was not helpful. Hopefully this will help someone in the future not make the same mistakes and save them some time. Now that I am able to capture left and right mouse clicks I can create and destroy cell tiles with just a few clicks!


Components


Another crucial part of Unity are Components as they are the building blocks of all things and if you want to do anything useful you will need to understand Components and how they affect GameObjects. Currently I am only using a few Components, such as colliders and Scripts, in order to keep things simple.

Game Map


The first script I created is the MapEditorScript which holds the relevant information pertaining to the whole game map such as cell stacks, units, and other map related logic. From the above image you can see the 5x5 grid of hexagons and in order to display those I need a few things defined. First, I need a prefab; creating one is easy if you follow these steps found in the documentation. In order for my script to run, it needs to be attached to a GameObject but before the map is created there are no GameObjects in the scene. This obstacle can be overcome by creating an empty GameObject and attaching the MapEditorScript to it. Once the scripted is added, I can run the preview and see the map generated at run time.


Cell Stack


I want to be able to click on each tile and create a new tile on top of the existing tile. To do this, I need some data structure to hold the stack of cells to be rendered and handle events on each click. I made a CellStackScript which handles everything related to the Cell Stack such as creating/destroying tiles which can be seen below.


The bulk of the work is done by the CreateNewCellTile() method which instantiate's the prefab, sets the position, orientation, and parent, adds the CellTileScript, and finally pushes the newly created tile onto the Cell Stack. This sequence of events allows me to click on each cell stack individually and grow and trim each stack separately.


Cell Tile


I mentioned above about adding the CellTileScript to the children cells. Before this script is added, only the very first tile (the bottom tile) has click events which is not realistic in this scenario especially when tiles begin to grow in size and hide tiles that are behind the stack. We must attach some click event to each child that allows it to create a new tile in its Cell Stack. By giving each Cell Tile the reference to the parent cell (bottom most tile), we enable the ability to call back to the parent and create or destroy cells with click events on each tile in the stack. 


Conclusion


The topics discussed above took some time to understand and I ran into many road blocks along the way. Fortunately I resolved these through some creative problem solving and deductive reasoning. I now understand how Components fit into the Unity framework and moving forward will begin to utilize them more often. Click events will be used quite frequently since it is the main method the user will interact with the game world.

The next thing I want to accomplish is to add a few textures dynamically to the tiles in order to give the them a bit more character as well as be more visually appealing. Lastly I want to modify the camera so I can move around and rotate, allowing me to view all sides of the map.

As always, feel free to leave a comment or question. Happy gaming!